This week’s experiment: Make Your Own Ghost
(aka: how to make a light bulb glow without plugging it in)
(aka: how to make a light bulb glow without plugging it in)
The purpose of this experiment is to
illustrate how we can generate electricity with our own bodies that can be used
to make a fluorescent light tube glow.
Stuff
you need:
Latex balloons
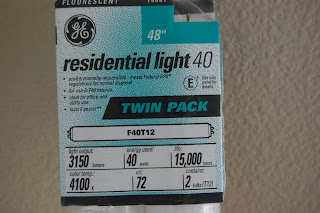
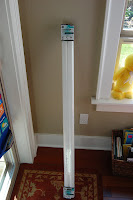
Long fluorescent light tubes
A dark room (we used a storage closet and a
bathroom with no windows)
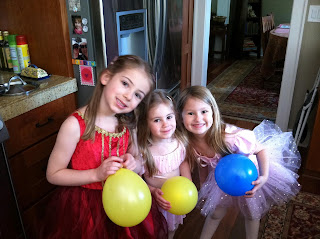
Curious Kiddos (costumes optional) pictured l-r, Kiddo JPO, Kiddo LPO, Kindergarten Kiddo)
We began this experiment by asking our Kiddos
to predict how we could make the light tube glow without plugging it in to a
socket. Our Kiddos guessed, “You can
make it glow with the sun.” And then…
“You can use static electricity!” Bingo.
This experience will be a lot more
interesting for your Kiddo if you spend some time building up his or her
background knowledge a bit. Keeping in
mind that this is an experiment for Kindergarteners (and one 3 year old
sibling), we kept our overview pretty basic.
First, talk with your Kiddo about how light
is a form of energy. This is a concept
that even very young children can grasp onto.
Next, explain that the fluorescent tube is coated inside with a special
chemical (phosphorous powder) that is turned on (glows) when it comes in
contact with energy. Describe how you
are going to use the balloon to create the kind of energy that the light tube
needs to glow. Finally, explain that in
order to see the light tube glow, you must conduct your experiment in a very
dark space.
Step One: Inflate and tie the balloon.
Step two:
Find a Dark room where you can shut out most incoming light. We used a closet, but a dark, windowless
interior room would work too.
You can try to do this under a very heavy blanket if your Kiddo gets too
scared of, say, being stuck in a small dark room; just be sure that all ambient
light is shut out.
Step Three: Place one end of the tube on the
floor and hold it upright. We
found it easier for the grown-ups to handle this part of the experiment. We also found that if you are working on non-carpeted surfaces, it works best if the grown-up holding the tube is also wearing socks
and can rest one end of the tube on the top of her toes.
Step Four: Rub the balloon up and down the
side of the tube as fast as you can.
Within seconds the tube will start glowing.
Here are two pictures that we managed to get
of the glow.
Don’t they look like ghosts?
Extra Credit: If your Kiddo is older (or a
genius) you can spend some time explaining about the ultraviolet light that
melts the drop of mercury inside the tube which turns into a vapor laden with
electrons that then interacts with the phosphorous powder coating the inside of
the tube. This is explained in detail in
Janis VanCleave’s book Physics for Every Kid, the book we used for this
experiment.
VanCleave’s book says, “Once the tube
starts glowing, even the nearness of the balloon causes light to be
produced.” We weren’t able to reproduce
this result, but honestly – who cares?
This experiment’s results were neat enough on their own.
Cost for this experiment: the two pack of light tubes was $5.99 and the balloons were $2.
A big THANKS to Momma K and Kiddos J&L for experimenting with us today!
A big THANKS to Momma K and Kiddos J&L for experimenting with us today!
P.S. Getting the photo of the glow was a bit
tricky. If you want to know how we did
it, leave a comment and I’ll reply – otherwise, the post gets too long.


This looks super cool! Thanks for sharing.
ReplyDelete